electrician
Electrician Services

Electrical in Construction

Electrical Professionals In Construction is one of the most crucial aspects of any project. But, it is also one of the most dangerous. Workers who use power tools are exposed to many hazards and risk gruesome burns and even deadly electrocution.

Fortunately, some steps can be taken to ensure the safety of everyone involved. These tips include using surge protectors and voltage regulators.

electrician

The tools of the trade on a construction site are powered by electricity, but that power needs to come from somewhere. Traditionally, builders used generators to provide temporary power for their projects. However, there are several other options for getting power on the job site.

Whether you need to keep equipment running while a new building is being constructed or want to power lighting and appliances in an existing structure as part of a remodel, temp power can be an essential tool for your company. The best option for your project is to work with a power company that can help you determine the power solutions that will be most effective for your unique situation. During the initial planning stage, a supplier will visit your site to inspect it and determine what power needs to be supplied. This typically includes how much power you need in both volts and amps, what areas of the site require power outlets, and how long you anticipate needing the power.

Once you have agreed on a plan, your power supplier will create a design map for how the system will be organized at the job site. The team may also need to visit the site again to finalize the layout. They will also need to apply for any necessary permits and schedule inspections. Having a power provider that understands your local permitting process will help ensure the system is installed properly and up to code.

Once the power is up and running, it’s important to follow proper safety procedures while working with it. The Occupational Health and Safety Administration states that contact with electricity is one of the leading causes of workplace fatalities. To reduce this risk, make sure all cords are kept clear of vehicle traffic and that you regularly inspect them for damage. If you see something that looks out of the ordinary, notify a supervisor immediately. Also, ensure all workers are trained in properly using electrical tools and follow all job rules regarding temporary power supplies.

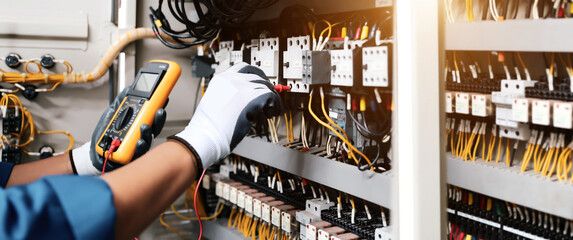
A switchboard is a power distribution system that divides incoming electric currents into smaller circuits. It can also re-direct and distribute the power to different areas or devices. It can be in a single panel, assembly panel, or structural frame format, and it contains various switches, overcurrent protective devices, circuit breakers, and buses.

The power supply to the switchboard is done through a circuit feeder, and it can be sourced from a transformer or directly from the main line. It’s also possible to have multiple feeds coming in, which is useful if the system has to serve more than one area.

Switchboards can be found in commercial and industrial facilities and large residential buildings. They can be used for powering appliances, lighting, and plug sockets, or they may be dedicated to supplying larger electrical equipment. They can have additional features like metering to record and display power consumption.

It’s important to know how these boards work to keep workers safe. The most important element of a switchboard is the main supply, which is normally from an underground or overhead wire connected to the main low-voltage switchboard, also known as a service entrance.

Then, the main power is channeled into the switchboard, and from there, it is distributed to each circuit by a bus bar. This bus bar can be extended horizontally and is called a through-bus. Some of these systems have an adjustable ampacity, which can be tapered to reduce downstream capacity as the load demands diminish.

A switchboard will have several power outlets, each with a breaker to protect against overloading. Having an isolating switch that disconnects and isolates all supplies from the board is also a good idea.

A sign should be placed on a switchboard that reads, “DANGER – LIVE PARTS IN ENCLOSURE,” this should be displayed anywhere that extra attention needs to be paid, such as when lifting covers. An additional sign indicating “After Hours Supply – Do Not Switch Off” should be displayed on the switchboard for circuits supplying equipment outside of normal business hours.

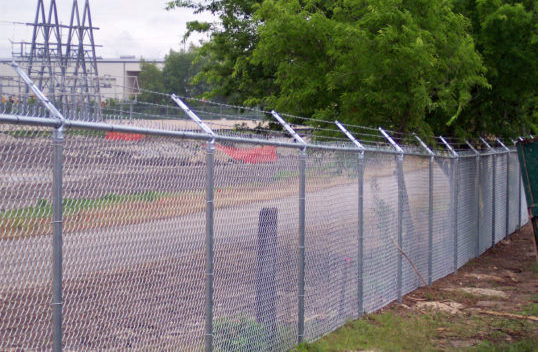
In power transmission and distribution, overhead lines carry large amounts of electric energy over long distances. Overhead power lines are usually constructed from steel wires or aluminum cables suspended from poles and towers. They can also contain equipment such as transformers, fuses, and reclosers. Power lines can be buried underground instead of being strung overhead. Still, this approach requires more expensive infrastructure and is more susceptible to outages caused by bad weather, high winds, or tree limbs falling on the lines.

The structure of an overhead line depends on its voltage and purpose. Low-voltage lines are usually bare conductors carried on glass or ceramic insulators or an aerial bundled cable system. Medium-voltage lines use a combination of wooden or tubular steel poles and lattice-type steel towers or pylons. High-voltage lines are often built on steel towers and ring structures with concrete bases.

These structures must be designed to support the weight of the conductors and their insulators and to withstand both the normal operating voltage and surges due to switching or lightning. Insulators are generally pin-type, which supports the conductor above the structure, or suspension-type, which hangs below it.

Today’s most common conductors used for overhead transmission are aluminum conductor steel reinforced (ACSR) or all-aluminum-alloy conductors. These have about half the resistance of a comparable copper conductor of the same diameter and are more cost-effective. Copper is still widely used at lower voltages and for grounding.

Overhead lines are often a form of visual pollution and may require special construction to minimize their impact, including adding guy wires to counteract forces on the lines that can cause them to sag. They are also more vulnerable to damage and outages due to weather, vehicle accidents, or trees falling on them than underground lines.

Accurately allocating overhead costs is important for a construction business to be profitable. There are several different overhead allocation methods, but the key is to find a balance that ensures that each job shares in the overall costs and benefits of the business and that the amount each pays is proportional to its share of the total burden.

Construction workers must follow proper safety protocols, whether working on a temporary power supply or a permanent connection. These include ensuring that all equipment operates correctly and that suitable personal protective equipment is worn. Also, workers should always unplug electrical equipment when it is not in use to avoid accidental contact with a live circuit. It is also important to watch for any signs of damage, such as cracks, frayed wiring, or exposed insulation.

In addition to implementing comprehensive safety plans, construction companies should conduct regular inspections and training sessions to ensure that all workers know the latest electrical safety rules. This can help to minimize the likelihood of an electrical incident causing serious injury or death on the job site.

All power lines should be kept at least ten feet from any ladders, scaffolding, tools, vehicles, or materials on a construction site. Suppose a worker comes into proximity to overhead power lines. In that case, they should call their local electricity utility company and await instructions before clearing the line or moving any equipment.

Workplaces should be equipped with RCD protection to minimize the risk of electric shock. This device monitors the current flow through a circuit and shuts off the power supply in many situations that could otherwise cause an electric shock, such as if someone touched a live wire or cable.

Electrical incidents are often preventable but can be very serious if not addressed quickly and effectively. Companies can significantly reduce the number of electrical incidents on their construction sites by implementing comprehensive safety plans, conducting regular training, and utilizing toolbox talks. These simple steps can save lives and provide peace of mind for everyone involved.

Chain Link Fence
Fences

The Benefits of a Chain Link Fence

Chain Link Fence New Jersey is a great way to keep people, animals, and other unwanted objects off your property. Whether you’re a business owner looking to prevent intruders or a homeowner trying to protect your children, a chain link fence can make all the difference.Chain Link Fence

Set your terminal posts and pour concrete into their holes. Once they’re dry, appoint your line post tops, placing the long flat side toward the fabric side of the fence.

The cost of chain link fencing can vary significantly depending on a number of factors, including the height of the fence, the gauge (thickness), the number of linear feet being fenced in, and whether gates are added. Additionally, the materials and labor price will affect the overall cost. For this reason, homeowners should clearly understand their fencing needs and how they can work within their budget.

The framework of a chain link fence is made of steel tubing that acts as posts and creates a frame for the mesh fabric to be hung. The steel wire in the mesh can be purchased in a variety of thicknesses, or “gauges,” that determine how sturdy and durable the fence will be. Thicker wires are more expensive and can also add to the strength of the fence. The mesh can also be purchased with a galvanized coating, which helps to prevent rust.

Some areas require a permit to install a fence, and the cost of getting one can be factored into the total project cost. This can include any fees charged by the local governing body as well as the costs of hiring a professional to obtain the necessary permits. Some professional fence contractors may include the cost of obtaining the permit as part of their installation fee, while others will charge the homeowner separately.

A chain link fence can be a great way to define property boundaries and keep children and pets safely enclosed in the backyard. In addition, it is easy to add privacy features to a chain link fence, such as aluminum slats that can be weaved into the openings during installation or afterward. Other options include bamboo privacy sections that can be installed on existing chain link fences.

Another important factor to consider is the potential resale value of your home. A chain link fence can help to increase your resale value, but it is important to remember that other types of fencing may offer better aesthetics and are easier to maintain.

Durability

A chain link fence can provide long-lasting security for your home or business. It is made from a galvanized steel mesh fabric that is woven together and attached to posts that are embedded in the ground. This type of fencing is available in a wide range of sizes and styles to suit your specific needs. It can also be designed with gates to add extra security and prevent unauthorized entry. There are several options to consider when choosing a chain link fence, including the gauge of the wire mesh and the size of the diamonds. The lower the number, the thicker the wire. Thicker wires are more expensive and are often used for high-security applications.

A good quality chain link fence will withstand many different types of weather conditions and can last up to 20 years or more with proper maintenance. The most important step in maintaining a chain link fence is to inspect it regularly for signs of damage or wear. If any issues are detected, they should be repaired promptly to prevent further deterioration. A rust-inhibiting coating can be applied to the fence to further protect it from corrosion and extend its lifespan.

The durability of a chain-link fence is also dependent on the materials used and the environment in which it is installed. High humidity, rainfall, or salty air can cause the materials to rust or corrode over time. To reduce the risk of this, it is essential to choose a galvanized steel fence that has been coated with a rust-inhibiting material.

Proper installation and regular maintenance can also extend the lifespan of a chain-link fence. It is crucial to ensure that the fence is properly tensioned to avoid sagging and weakened spots. Regular cleaning can remove dirt and debris that can build up over time. It is also important to trim vegetation near the fence to prevent it from exerting excessive pressure on the materials and causing damage.

A well-maintained chain link fence can be a great addition to any property. It is easy to clean and can be easily repaired if needed. It also provides privacy and security for homes, businesses, or schools. However, it is important to note that a chain-link fence may not increase the value of your property as much as other fence options.

Security

Many homeowners choose chain link fences to protect their backyards and children from intruders and other hazards. These fences are often less expensive than other fencing options and offer great value for the money. When designing a chain link security fence, it is important to take into account the level of protection needed and the size of the property. For example, a basic 9-gauge chain link fence may be enough to keep intruders out of a residential yard, while a commercial building might require an 11.5-gauge model with added barbed wire. Depending on the desired level of security, there are a variety of cost considerations, including whether to use metal or wood posts, the gauge of wire, and additional steel components like barbed wire arms.

The gauge of chain link mesh can significantly impact the overall cost of the fence, as lower numbers mean thicker wire. Higher-gauge chains also provide greater strength and durability, making them a better choice for areas that will see high levels of traffic or harsh weather conditions.

Another factor that can affect the cost of a chain link fence is the type of metallic coating used. Different coatings offer different levels of corrosion resistance and varying appearances, so it is important to understand what each option offers before making a decision. For example, a galvanized coating will last longer and resist rust and corrosion better than an aluminized or galfan finish.

Chain link fences can be enhanced with security measures such as razor coils and inserted visual barrier strips, which can deter vandalism and other crimes. In addition, there are a variety of lockable gates available to prevent access to sensitive areas and protect vehicles and equipment on-site.

For a higher degree of security, the use of mini mesh is a great option. This tighter spacing makes it nearly impossible to cut or climb the fence, and it is used by state and federal agencies, prisons, and power plants.

For a more aesthetic appearance, privacy slats can be inserted into the chain link mesh to create a more secluded space. These slats are available in a variety of colors and designs to match any home or yard, and they can be easily installed on the fence. However, these add-ons will increase the upfront cost of the fence, so it is important to balance the need for security with the homeowner’s budget.

Aesthetics

Chain link fences aren’t the most aesthetically pleasing type of fencing, but they provide many benefits. They offer a high level of security, as they help prevent burglars and unwanted animals from entering the property. They also provide a barrier that helps to delineate the boundary of a home or business, reducing the chances that children or pets will leave the property unattended. In addition, they are cost-effective and durable.

One way to make your chain link fence more aesthetically appealing is to paint it. Choose a color that complements your home or business, and then apply it to the entire fence. This is an inexpensive and simple way to improve your fence’s appearance, and it will not damage the metal. You can even try stenciling unique designs on the fence for added visual appeal.

Another easy way to enhance the look of a chain link fence is by installing privacy screens or fabric on it. These are available in a variety of colors and patterns, making it easy to find something that matches your home or business. You can also use natural materials like bamboo or reed to cover your chain link fence, which is a more natural way to add privacy to your yard.

To reduce the harsh, industrial look of a chain link fence, consider adding decorative caps to the top of each post. These can be purchased in a variety of designs and materials, and will instantly elevate the look of your fence. They can be easily secured to the top of the line posts by using fasteners that are designed for outdoor use.

Another popular and simple way to improve the aesthetics of a chain link fence is by planting flowers or herbs in planter boxes. This is a great way to add color and scent to your backyard, while also allowing you to show off your gardening skills. Incorporate a mix of seasonal flowers and herbs, including summer annuals, such as petunias, or fragrant perennials, such as geraniums. You can also hang banners and flags from your chain link fence, which will allow you to express your personality and passion for sports or other interests.

concrete
Concrete Services

The Importance of Proper Concrete Installation

Concrete is one of the strongest building materials available, but it must be poured correctly to avoid problems. The process is labor-intensive and requires specialized tools. It is often best to hire Concrete Contractors Colorado Springs for concrete installation.

After the bull float smooths the concrete, use a magnesium hand float to create a smooth finish. Work the surface until it is smooth and free of drag marks.

concrete

Concrete is a strong and durable material used to construct foundations, patios, sidewalks, driveways, walls, and other structures. Proper concrete installation and preparation procedures are crucial to the longevity of your project. This includes excavating the space to the correct depth, laying a subbase and damp-proof membrane as needed, and ensuring the surface is level and obstructed. If these steps are not taken, your concrete could crack or crumble in the future.

To begin the process of preparing for a concrete pour, mark out the area to be poured with stakes and string. This helps ensure that the concrete is poured exactly where it needs to be and stays contained while it sets. It is also good to note any pipes, wires, or other obstacles near your concrete, as they must be avoided during construction.

Once the form boards are in place, treating them with light-bodied petroleum oil or shellac (if using wooden forms) is a good idea to prevent the concrete from sticking to the forms once it hardens. This will also allow the forms to be removed easily once the concrete has been set.

Depending on your project, you may need to excavate the area, compact the soil, and add a layer of gravel for drainage. If you are working with clay or loamy soil, this is especially important, as these types of soil tend to move and settle, which can cause concrete slabs to crack, even when reinforced with steel and microfibers.

Once the base is in place, it is a good idea to use a plate compactor to compress each subbase layer. It is also a good idea to use a long-handled groover to cut control joints into your concrete once it has cured, as this will help to prevent cracking and settlement in the future.

Now that the concrete has been poured, it is a good idea to smooth it with a large floating device known as a bull float and then with a magnesium hand float for a more professional finish. Once the concrete dries, it is possible to add texture for traction with a concrete broom, and decorative stamping can also be done at this point.

The type of mix you use for your concrete is a huge factor in the quality of the finished product. Many different concrete mixes are available, each with its particular properties and strengths. Concrete is a composite material that requires careful mixing to achieve the desired results. Whether mixing your concrete or purchasing pre-mixed bags from your local hardware store, it is important to follow the instructions on the packaging. Using the proper water-to-concrete ratio and following safety precautions are crucial for success.

There are several ways to mix concrete, from a mixer with a bucket to a wheelbarrow and even by hand. The method you choose depends on the size of your project and what tools or equipment you have on hand. If you are working with a larger job like a concrete countertop, renting or buying a cement mixer is best. If you are working on a smaller project, you can mix the concrete by hand in a large bucket, washtub, plastic sheet, or tarp. When mixing concrete by hand, wearing thick gloves that will not rip is important. Concrete is caustic, so you want to protect your hands as much as possible.

If you are using a mixer, add the dry concrete mix and create a small divot in the center. Pour in about 3/4 of the water and mix thoroughly. Remember that the amount of water needed varies by mix, so check the instructions on the package for exact measurements.

Once the concrete has been mixed, it is important to let it rest for about one minute. This gives the concrete time to hydrate and improves its strength. After letting it rest, it is important to test the consistency. If the concrete is too wet, it will pack into a ball and crumble when touched. It will be stiff and difficult to work with if it is too dry.

If you are still deciding what type of concrete to purchase, the staff at your local hardware store should be able to help. They can advise you which mix will be best for your project and provide guidance on properly using the equipment for mixing. They can also assist you with performing a slump test to determine the consistency of your concrete.

Pouring a solid concrete slab is essential in nearly all construction projects. It’s used to provide support for a wide variety of structures, including floors, driveways, and foundations. While most people think pouring concrete is a very hard and laborious task, it is fairly straightforward if the proper steps are taken.

First, prepare the area where the concrete will be poured by digging a hole that’s the exact size and shape of the future slab. Next, remove any grass, rocks, dirt, or other debris until the raw earth is exposed. Once the area has been cleared, it’s time to start building the form. Use standard lumber like 2×12 boards to create a rectangular or square shape that will be the concrete form. Nail the form boards to stakes driven into the ground, and level the site as necessary using a builder’s level.

To avoid mistakes that could compromise the quality of the concrete, you’ll want to carefully plan out your project before beginning the actual concrete pour. For example, you’ll want to ensure the weather suits a concrete pour. If rain is in the forecast, it may ruin the appearance of the finished product and increase the risk of cracking and scaling. A moderately warm, dry day is ideal for pouring concrete.

One of the most common mistakes that DIYers make is adding too much water to their concrete mix. This can make the concrete easier to work with and pour but also reduce its strength. Using the right water-cement ratio and mixing is important for achieving high-quality concrete.

After pouring the concrete, you’ll need to level and smooth it. A wood or bull float can create a smooth surface, but you must move slowly and apply gentle pressure. To achieve a professional finish, follow up with a magnesium “mag” float to polish the concrete to a high shine.

For safety reasons, professionals and DIYers should wear the appropriate protective gear when working with concrete. This includes long pants and sleeves, protective eyewear, and alkali-resistant gloves. Wearing a disposable dust mask is also a good idea, as wet concrete can irritate the throat and respiratory tract.

Concrete can be finished in several ways to make it more attractive and easier to maintain. These finishes range from smooth to rugged and can be done in various colors. The key to a good finish is timing. The finishing process should begin almost immediately after the concrete is poured and the bleed water has disappeared. The concrete finisher should know exactly when to use each tool in the finishing process. This is an art learned through years of experience and can be the difference between a poor-quality slab of concrete and one that lasts a lifetime.

The concrete is troweled by hand or with power floats during the finishing stage to create a smooth surface. It is also screeded or leveled at this point. This step is important to ensure that the concrete will be of uniform height. The concrete can be used for light foot traffic 3 to 4 days after placement and can be driven 5 to 7 days after that, but the curing process isn’t complete until 28 days have passed.

The final steps in the concrete installation process are finishing and curing. The concrete is brushed to remove any hydration water, and a sealer is applied to prevent stains and protect the concrete. The concrete is then allowed to cure. During this time, the concrete will strengthen, which can take up to a month. The concrete can be used after curing for pedestrian and vehicular traffic.

Although DIYers can pour and finish their concrete, it is recommended that a professional crew be hired to do the job. Concrete is heavy and requires special equipment to handle it properly. A concrete contractor is trained to work safely and has the proper tools to do the job. An experienced concrete finisher can also read the concrete and know when to tamp or smooth it. This can save time and money by working the concrete effectively. Concrete finishers can also add a decorative touch to the concrete by stamping and staining it before finishing.


lighting installation
Electrician Services

Lighting Installation

Lighting installation is a bit more complicated than simply plugging in a new lamp. Because many light fixtures are installed in ceilings or high up on walls, installing them requires a ladder and sometimes a helper to support the fixture and hold nuts and tools.

Start by shutting off power at the breaker box to the room you are working in (note that shutting a single breaker shuts off power to just that area of your home). Use a voltage tester to confirm that the electricity is completely off. Make sure to talk with Nashville Lighting Installation professionals for your lighting projects.

lighting installation
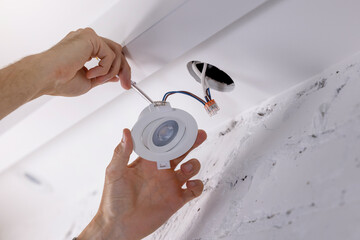
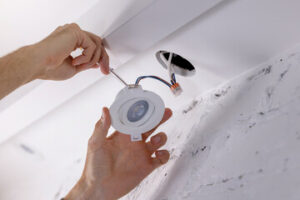
Choosing The Right Fixture

When you want to add light fixtures to your home, you have a lot of options. However, it is important to choose the right fixture for your needs and the look you are going for in your home. The wrong fixture can make your home feel dark and dated, while the right fixture can elevate your home’s aesthetic appeal.

When it comes to choosing a new lighting fixture, the first thing you need to consider is the style. There are a wide range of styles available, from chandeliers to recessed lighting. It is a good idea to choose a style that will complement the other design elements in your home, such as paint color or furniture. You will also want to choose a fixture that is suitable for the room in which it will be installed.

Another important factor in deciding on the type of light fixture is the amount of light you need. This can be determined by measuring the height and width of the room. Then, you can use the result to calculate how large of a fixture is needed. It is a good idea to choose the largest fixture that will fit comfortably in your space, but not so large that it will be difficult to install and operate.

Finally, you will need to decide what kind of bulb you would like in the fixture. There are many different types of bulbs, including incandescent, fluorescent, LED, halogen, and mercury vapor. Each of these types has a unique color tone and can be used in different types of fixtures. It is important to choose a bulb that is compatible with the fixture and will provide the amount of light you need.

Once you have selected the light fixture and a style that will work well in your home, it is time to begin the installation process. It is a good idea to have a professional handle the lighting installation, as they will be able to ensure proper load balance and precision. In addition, they will be able to properly identify and address any potential issues before they become costly problems down the road.

Choosing The Right Light Bulbs

The right light bulbs can enhance the look of a room and create the perfect ambiance. They can also save energy and reduce the amount of time you spend replacing burned-out light bulbs. When choosing light bulbs, it is important to consider color temperature, wattage, and shape.

First, you need to decide what type of color temperature you want to use in the room. For example, if you want a warm and cozy feel in your bedroom, you may want to choose soft white light bulbs with lower wattages. On the other hand, if you want a brighter, more energetic room, you might prefer daylight bulbs with higher wattages.

Once you know what type of bulb you need, you can start shopping around. There are a lot of options out there, from traditional incandescent bulbs to energy-efficient LEDs. When you are shopping for lights, look at the wattage and lumens on the package. Watts measure how much power a bulb uses and can give you a general idea of its brightness, but the most important factor is lumens. The higher the lumens, the brighter the bulb.

Another thing to keep in mind is the shape of the bulb and how it will fit in your fixture. Light bulbs come in a variety of shapes, from standard round to long, slim bulbs designed for hard-to-reach fixtures like candelabras and floor lamps.

Finally, if you are looking for a smart light bulb that can be controlled with a smartphone or tablet, you will need to make sure the bulb is compatible with your home’s wireless system. Some lights can even be set to turn on or off automatically based on movement, making them ideal for exterior security lighting.

Once you have decided on the color, wattage, and shape of your light bulbs, it’s time to shop around for the best deal. Many stores have coupons and deals, so be sure to check online before you go to the store. Also, don’t forget to factor in shipping costs and any other charges, such as recycling fees.

Choosing The Right Wiring

When working with electricity, it is always important to take safety precautions. You should turn off the power to any lights or switches you want to work on and test for electrical current with a circuit tester before starting. This will ensure that you do not accidentally make a dangerous mistake with your wiring. Once you have tested for current, you can begin to work on the wiring for your new light fixture.

When you are ready to start, it is a good idea to clean the old fixture and installation area before beginning. It will be easier to work in a clean environment, and you will reduce the risk of making mistakes that could be dangerous. You will also need to remove the mounting bracket from the ceiling or wall that holds the existing light in place. This is usually done with a Phillips-head screwdriver. Once the bracket is removed, you will be able to access the wires in the ceiling.

Once you have removed the old wires from their terminals, you will need to decide what type of wiring you will use for your new light fixture. Generally, you will want to use thicker wires than those used in your house, as these are more durable and can handle more amperage. If you do not know what type of wire you have, you can check the amperage rating on the fuse or circuit breaker, or try to determine it by its color (black is typically hot, and white is neutral).

After you have determined what kind of wire you have in your home, you will need to choose a wire gauge. The higher the number on the gauge, the thinner the wire. You should select a wire that is rated for the amount of amperage you expect to use, or that is recommended for the light fixture itself. For example, LED lights do not draw a lot of current and can be powered by smaller gauge wires than other types of lighting fixtures.

When you are ready to splice the new wires, you will need to use a wire connector to connect them. Normally, the black wire from the switch will be connected to one terminal of the new light fixture, and the white wire from the light will be connected to the other terminal of the switch. A pigtail will then be added so that the first new light can reconnect back into the circuit.

Installing The Light

Installing a new light fixture is one of the quickest and easiest upgrades you can make to your home. However, like any electrical project, it requires careful attention to safety. First, always read the manufacturer’s instructions before starting work. Most fixtures come with simple step-by-step instructions that will guide you through the process. Then, once you have installed the fixture, check to make sure that it is plugged in and that all the wires are connected properly. Generally speaking, black and white wires connect to silver screws in the ceiling box, while a green (grounding) wire will either attach to the grounding screw or a dedicated copper wire that comes from the electrical panel.

If you are replacing an existing fixture, it’s best to have a helper for this project — especially if the new fixture is large or heavy. Shut off power at the breaker box to the circuit that powers the old fixture and label the breaker so that no one accidentally turns it back on. It’s also a good idea to double-check that the power is off by using a non-contact voltage tester.

Then, carefully unscrew the fixture from the ceiling and remove any light bulbs, shades, or glass covers that are still attached. This makes the fixture easier to handle and protects you from broken glass. It’s a good idea to take pictures of the wiring connections so you can refer to them when you’re installing the new fixture.

Once the old fixture is removed, disconnect the wires from the ceiling by loosening the connector caps and gently pulling apart the wires. Then, use a wire stripper to cut off 3/4 inch of the sheathing on each end of the wire. After that, simply twist like-colored wires together and cap them with a wire nut. Then, attach the fixture’s mounting bracket to the junction box and screw it into place. If the light is a ceiling fan, be sure to screw it into a brace box that will support it without drilling additional holes in the ceiling. If you’re not comfortable working with electricity, hire a licensed electrician to tap into your house’s wiring and install a junction box for your new light fixture.